After creating a WCF service, the next step is to host it so that the client applications can consume it. This is known as WCF service hosting.

A WCF service can be hosted by using any of the four ways given below −
IIS Hosting − IIS stands for Internet Information Services. Its working model is similar to that of ASP.NET while hosting a WCF service. The best feature of IIS hosting is that the service activation is processed automatically. IIS hosting also offers process health monitoring, idle shutdown, process recycling, and many more features to facilitate a WCF service hosting.
Self-Hosting − When a WCF service is hosted in a managed application, it is known as self-hosting. It requires a developer to write the requisite coding for ServiceHost initialization. In self-hosting, a WCF service can be hosted in a variety of applications like Console application, Windows form, etc.
WAS Hosting − Hosting a WCF service in Windows Activation Service (WAS) is most advantageous because of its features such as process recycling, idle time management, common configuration system, and support for HTTP, TCP, etc.
Windows Service Hosting − For local system clients, it is best to host WCF service as a window service and this is known as Window Service Hosting. All the versions of Windows support this type of hosting and here, the Service Control Manager can control the process lifecycle of the WCF service.
Step 1: Create a new Visual Studio project
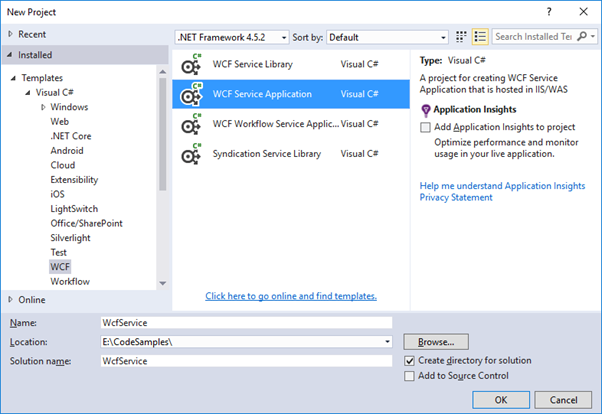
Choose the WCF installed template and create a new WCF Service Application:
Step 2: Create your web service code
Update the IService1.cs and Service1.svc.cs classes that are automatically created.
You can of course delete these and create your own but I am re-using here for the sake of brevity.
For ease of demonstration I will create an extremely simple “Hello world!†example.
IService1.cs
12345678910111213usingSystem.ServiceModel;usingSystem.ServiceModel.Web;namespaceWcfService{[ServiceContract]publicinterfaceIService1{[OperationContract][WebGet(UriTemplate ="/HelloWorld/")]stringHelloWorld();}}Service1.svc.cs
12345678910namespaceWcfService{publicclassService1 : IService1{publicstringHelloWorld(){return"Hello world!";}}}Re-build the visual studio project.
Observe that a bin/ folder containing our libraries is then created.
When creating the service using IIS manager we will need this as well as the web.config and Service1.svc files.
Step 3: Create the IIS service
Open IIS Manager.
Navigate to the folder location at which you would like to create the the service – right click and select Explore.
Create the folder which will contain your web service code (confidential bits redacted)
Navigate to this folder and copy in the bin/ folder and Service1.svc / web.config files created that were mentioned previously.
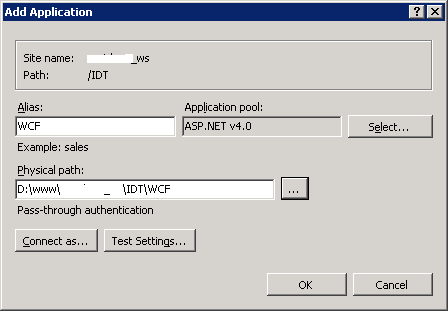
Now in IIS manager select Add application.
Fill in the details (some details here redacted for confidentiality)Click OK.
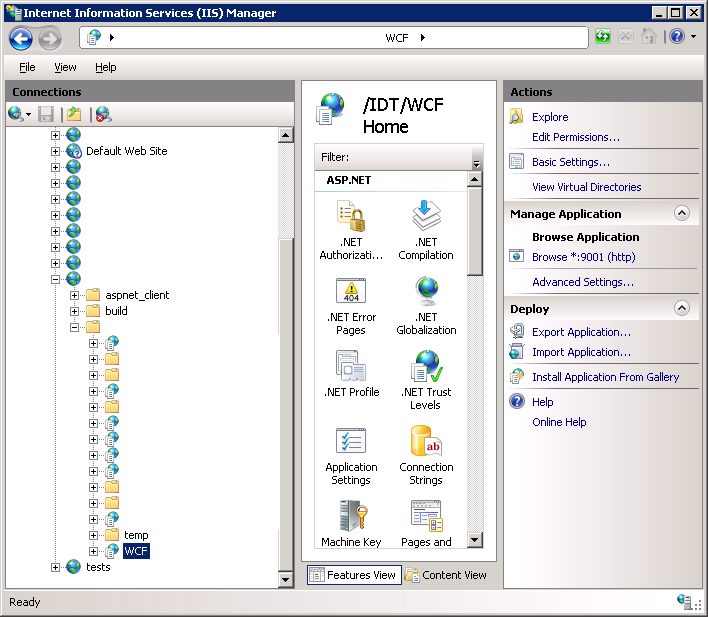
Here is mine, again with confidential bits scrubbed out:
To quickly test the service, right click on the service and select Manage Application > Browse.
The service should appear in a browser as shown:
Step 4 – consume the web service.
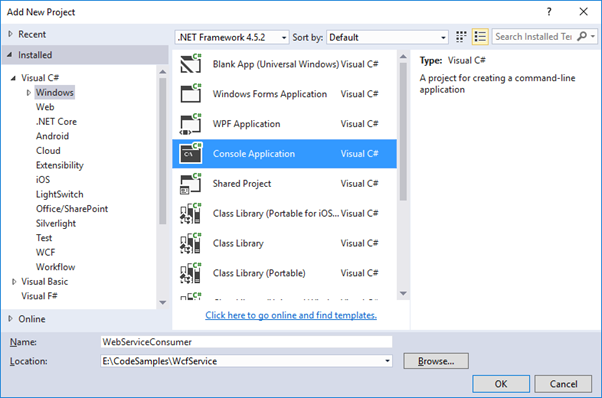
In your Visual Studio, create a new Console Application.
On the solution folder select Add > New Project…
Set this console app as the selected startup application.
In the console set the project dependencies like so:
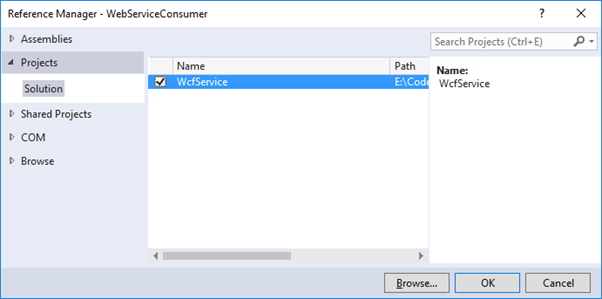
And also make sure the WCF service project is also being referenced:
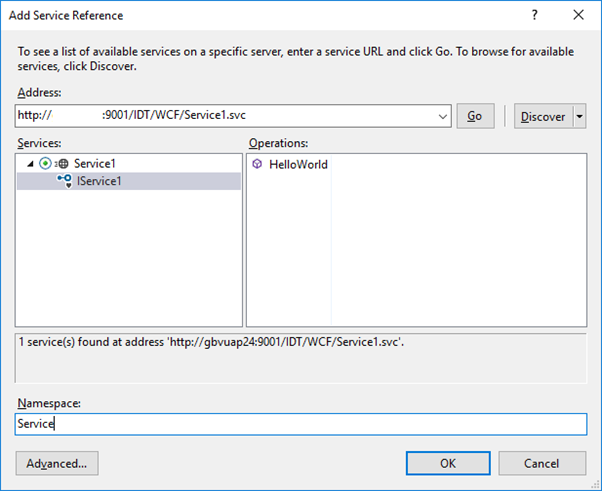
Add a service reference.
Right click the console app project and select Add > Service Reference…
Set the URL of your IIS manager service and press the Go button:
(Ive redacted part of the url also for confidentiality)
Click OK.
Step 5: Consume the service
Modify Program.cs to access the web service reference:
Program.cs
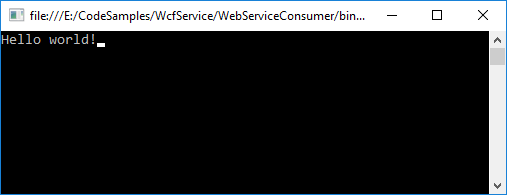
123456789101112131415usingSystem;usingWebServiceConsumer.Service;namespaceWebServiceConsumer{internalstaticclassProgram{privatestaticvoidMain(){varservice =newService1Client();Console.Write(service.HelloWorld());}}}On running the program the web service set up in IIS manager is accessed as shown:
 Best resource for Online free Education
